Final Walkthrough Before Closing on a Rental
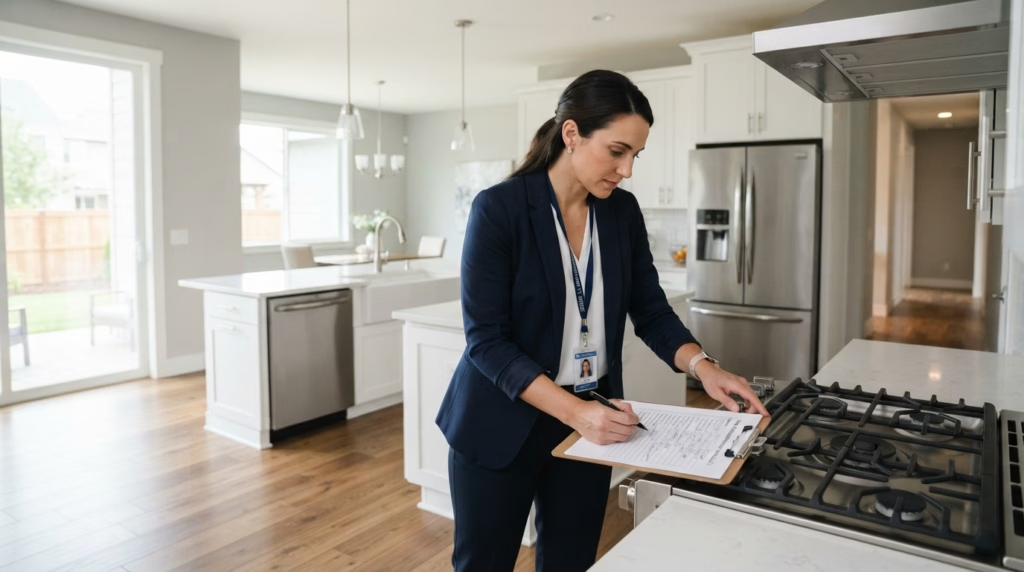
A final walkthrough inspection gives you one last chance to confirm that the residential rental property is in the condition you agreed to buy.
This visit usually takes place shortly before closing. By then, the seller should have completed any agreed repairs, removed personal belongings, and prepared the property for transfer. Your job is to check that nothing important has changed since the home inspection and that the items included in the sale are still there.
For a rental property, you also need to confirm tenant records, security deposits, keys, appliances, utility arrangements, and unfinished maintenance items. A careful walkthrough can catch problems before they become yours.
Build a Stronger Rental Property Business
Subscribe to our 2X weekly newsletter to learn more about managing tenants, protecting cash flow, improving rental operations, and making better real estate investment decisions.
Prepare Before You Arrive
Do not rely on memory. Bring the documents that describe what the seller agreed to deliver:
- Purchase agreement
- Home inspection report
- Repair addenda or seller credits
- List of fixtures and appliances included in the sale
- Rent roll and current leases
- Security deposit schedule
- Notes and photos from earlier visits
- Blank walkthrough checklist
- Phone, camera, and flashlight
The Consumer Financial Protection Bureau recommends completing a walkthrough before signing closing documents and checking that agreed repairs have been finished in its closing checklist.
Mark the repairs, included items, and unanswered questions before you reach the property. This keeps the visit focused.
BUYER INSPECTION TOOL
Final Walkthrough Checklist
Verify the condition of a residential rental property shortly before closing. Record missing items, incomplete repairs, new damage, and rental documents that still need attention.
Closing Follow-Up
This checklist is an educational inspection and recordkeeping tool. It does not replace a professional property inspection, legal advice, the purchase agreement, or instructions from your agent, attorney, lender, or closing professional.
Schedule It Close to Closing
Try to complete the walkthrough after the seller has moved out and contractors have finished. A visit made too early may not show the property’s final condition.
Freddie Mac recommends arranging the walkthrough close to closing in its home-closing guidance. Many buyers complete it within 24 hours of signing.
Occupied rentals require more coordination. Follow the lease and local notice rules before entering rented units, and work through the seller, agent, or current manager. Do not tell tenants that you are already their landlord. Ownership does not change until closing is complete.
Begin With the Exterior
Walk around the house before going inside. Compare the exterior with the inspection report and earlier photos.
Check the roof from the ground, siding, gutters, windows, porches, decks, steps, railings, driveway, garage, fencing, landscaping, and drainage. Look for storm damage, broken windows, missing fixtures, dead landscaping, construction debris, or damage caused during the seller’s move.
Confirm that included exterior items remain onsite. These may include a shed, mailbox, security cameras, garage-door openers, or outdoor equipment listed in the contract.
The National Association of REALTORS® provides a useful final walkthrough checklist that also recommends checking for major changes and confirming that included items remain.
Walk Through Every Room
Inspect each room in the same order. Open closets, cabinets, and interior doors. Look at walls, ceilings, floors, windows, and fixtures.
You are not repeating the full home inspection. You are checking for new damage, missing items, unfinished work, or problems that were hidden by the seller’s belongings.
Look for moving damage and abandoned items
Large furniture and appliances can scratch floors, dent walls, damage doors, and loosen railings. Check garages, basements, attics, closets, and yards for furniture, paint cans, building materials, or trash left behind.
Test plumbing and electrical items
Run faucets, flush toilets, and look below sinks. Check for leaks, slow drains, water stains, and moisture near the water heater.
Turn on lights and test representative switches and outlets. Confirm that included appliances remain in place and perform a basic operating check. If utilities are off, ask how the seller will allow you to verify the systems before closing.
Check heating, cooling, and safety features
Test the thermostat and operate heating or cooling when conditions permit. Check smoke alarms, carbon monoxide alarms, locks, handrails, and garage-door safety features.
The walkthrough does not replace a licensed inspection, but it can reveal a clear change or failure that appeared after the inspection date.
Verify Every Agreed Repair
Bring the repair agreement and check each item one by one.
A paid invoice does not prove the work solved the problem. Inspect the repaired area and test it when possible.
Ask:
- Was the correct repair completed?
- Does the item now work?
- Was related damage corrected?
- Is the area clean and finished?
- Are permits, warranties, or receipts available?
- Did the work create another problem?
If the seller agreed to fix a plumbing leak, check the pipe and the nearby cabinet, flooring, or drywall. If a window was replaced, confirm that it opens, closes, and locks.
Photograph completed repairs and anything that still needs attention. Do not rely on a verbal promise that a contractor will return after closing. Ask your agent or attorney to document any remaining work.
Give Occupied Rentals Extra Attention
When tenants remain, check both the property and the rental information without disturbing their privacy.
Do not search through belongings or make promises about rent, repairs, pets, or renewals. Instead, compare what you can observe with the seller’s records.
Confirm that:
- Occupied units match the rent roll
- Included appliances remain in the correct units
- Parking and storage assignments exist as described
- Shared laundry equipment remains onsite
- Utility meters and panels match the seller’s explanation
- Pending repairs appear complete
- Common areas remain clean and accessible
If you cannot enter a unit, record that limitation and ask your agent or attorney how the contract addresses it.
Review the Rental Records Before Closing
A house can look fine while the lease files contain mistakes that affect your income.
For each tenant, confirm the name, unit, rent, lease dates, security deposit, recurring charges, utility responsibilities, unpaid balances, concessions, pending notices, and open maintenance requests.
Compare the rent roll with the signed lease. If the rent roll says $1,700 but the lease says $1,600, investigate the difference before closing.
Reconcile deposits tenant by tenant. The amount shown in the lease, tenant ledger, and closing transfer should agree. Also verify whether local law requires interest, notice, or a particular transfer procedure.
Account for Keys, Codes, and Utilities
Create a list of everything the seller must deliver:
- Building and unit keys
- Mailbox and storage keys
- Garage remotes and gate devices
- Alarm and smart-lock access
- Thermostat or camera accounts
- Laundry-room keys
- Parking permits
- Utility meter information
- Appliance manuals and warranties
For a duplex, triplex, or fourplex, confirm which meter, electrical panel, shutoff, parking space, and storage area belongs to each unit.
Ask when utilities will transfer. Service should remain active long enough for the walkthrough and closing. Otherwise, you may be unable to test plumbing, appliances, heating, or cooling.
Decide What Needs to Happen Before Closing
Not every issue should delay the sale, but every material issue should have a written answer.
Minor items
Small cosmetic marks, a missing remote, or leftover trash may be resolved through cleanup, replacement, or a modest credit.
Items requiring written resolution
An incomplete repair, damaged appliance, missing fixture, or incorrect deposit amount may require a repair, replacement, credit, or escrow holdback, depending on the contract.
Major concerns
Active leaks, major new damage, missing tenant deposits, removed appliances, inaccessible occupied units, or serious lease discrepancies can affect value, insurance, financing, or your ability to manage the property.
Do not decide the remedy alone at the house. Contact your agent, attorney, lender, or closing professional and follow the purchase agreement.
Save the Walkthrough as Your Opening Property Record
Keep the completed checklist, photos, videos, repair receipts, deposit schedule, leases, key inventory, meter readings, and written resolutions in the property file.
These records establish the condition at purchase and help you plan immediate repairs and tenant communication. After closing, notify tenants of the ownership or management change as required and give them accurate payment, maintenance, and emergency contact information.
Check Carefully Before You Sign
A final walkthrough inspection should confirm that the residential rental property is in the expected condition, agreed repairs are complete, included items remain, and the rental records are ready to transfer.
Bring the contract and inspection documents. Walk the exterior and every accessible room. Test basic systems, inspect repairs, review tenant records, and account for keys, deposits, and utilities.
The walkthrough may confirm that the property is ready. It may also uncover a problem that is far easier to address before closing than after the house becomes yours.