12-Step Tenant Turnover Checklist for Landlords [Free Template]
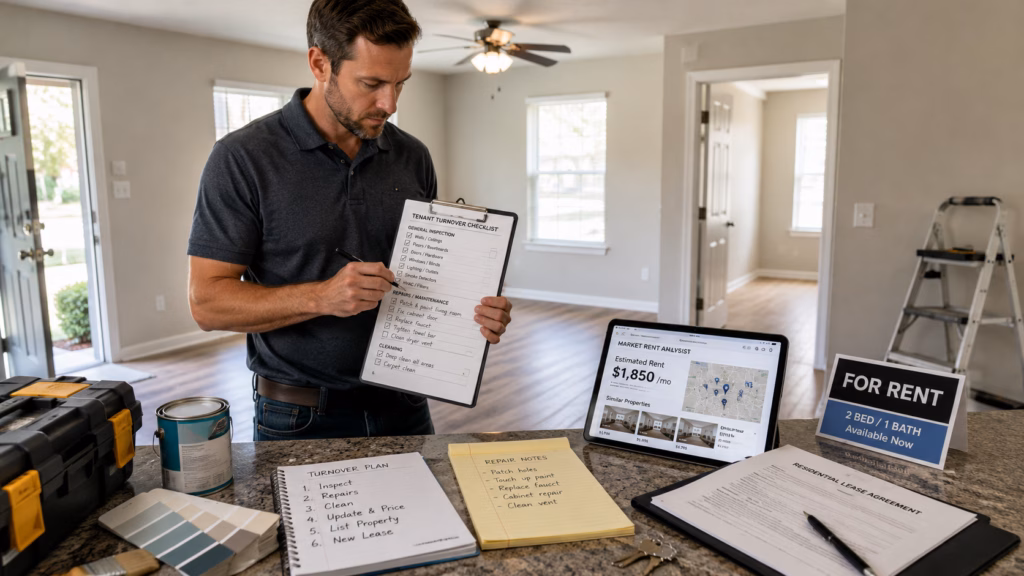
A tenant turnover checklist helps landlords move from one tenant to the next with less vacancy, fewer missed steps, and better documentation. Tenant turnover is not just the day a tenant moves out. It begins when notice is given and continues through inspection, repairs, pricing, marketing, screening, lease execution, and move-in preparation.
A poorly managed turnover can cost a landlord weeks of rent, create security deposit disputes, delay repairs, and lead to rushed tenant screening. A well-managed turnover keeps the process organized and helps the rental return to income-producing status faster.
The goal is not to rush. The goal is to move efficiently without skipping the steps that protect the property.
Download the Free Tenant Turnover Checklist
Get the editable Word and PDF versions of our tenant turnover checklist when you subscribe to our 2X weekly newsletter for landlords, real estate investors, and rental property owners.
Why Tenant Turnover Planning Matters
Turnover is one of the most expensive moments in the rental cycle. The property may stop producing rent, but expenses continue. The owner may still pay mortgage, taxes, insurance, utilities, HOA dues, landscaping, cleaning, repairs, and advertising.
A good checklist creates a repeatable process. It helps landlords confirm the move-out date, document condition, return or deduct from the security deposit properly, complete repairs, update rent pricing, relist the property, and sign the next lease.
The Legal Information Institute defines a security deposit as money a tenant provides to help secure performance under the lease, including payment obligations and care of the premises. That is why turnover documentation matters. If a landlord later needs to deduct for damage, cleaning, or unpaid amounts, the records should support the decision.
Step 1: Confirm Notice and Key Dates
The turnover process begins when the tenant gives notice, or when the landlord gives lawful notice that the lease will not be renewed.
Confirm the Move-Out Date
Get the move-out date in writing. Confirm whether the tenant is leaving at the end of the lease term, breaking the lease early, or vacating under another agreement.
The landlord should also confirm final rent due, move-out deadline, key return instructions, utility expectations, forwarding address, final inspection timing, and any required local notice rules.
This is also the time to review the lease. The lease may define notice periods, cleaning obligations, early termination charges, rent responsibility, and deposit handling.
Step 2: Send Move-Out Instructions
Clear move-out instructions reduce confusion. They also help tenants understand what condition the property should be in when they leave.
What to Include
A move-out instruction email or letter may include:
- Required move-out date and time
- Cleaning checklist
- Trash removal expectations
- Appliance cleaning instructions
- Yard or exterior responsibilities
- Key, garage remote, and access card return
- Utility instructions
- Forwarding address request
- Reminder to remove all personal property
- Final inspection process
- Security deposit timeline
Avoid vague instructions such as “leave the property clean.” Be specific. For example, ask the tenant to clean appliances, remove all belongings, wipe cabinets, clean bathrooms, sweep floors, remove trash, and report any known damage.
Step 3: Schedule a Pre-Move-Out Walkthrough
A pre-move-out walkthrough is not required everywhere, and rules vary by state. When allowed, it can help reduce disputes and identify obvious issues before the tenant leaves.
Why It Helps
The walkthrough gives the landlord a chance to point out visible problems and gives the tenant a chance to correct certain items before move-out.
The landlord should avoid making final deposit promises during this walkthrough. Some damage or cleaning issues may not be visible until the property is empty.
Download the Free Tenant Turnover Checklist
Get the editable Word and PDF versions of our tenant turnover checklist when you subscribe to our 2X weekly newsletter for landlords, real estate investors, and rental property owners.
Step 4: Prepare for Relisting Before the Tenant Leaves
Landlords should not wait until the property is empty to begin planning the next lease. In many cases, marketing preparation can begin before move-out.
Gather Listing Materials
Before the tenant leaves, review current rent comps, prior listing photos, property description, known repairs or upgrades, pet policy, parking details, utility responsibility, available date, showing plan, and lease terms.
If the property is occupied, coordinate showings carefully and follow lease terms and local law for entry notices. If the property needs major repairs or photos are outdated, wait until the unit is ready for new photos.
Step 5: Complete the Final Move-Out Inspection
The final inspection should happen after the tenant has moved out and returned possession. The property should be empty enough for the landlord to inspect floors, walls, appliances, cabinets, fixtures, windows, doors, plumbing, and exterior areas.
What to Document
Use photos, video, and a written checklist. Document walls and paint, floors and carpets, windows and screens, doors and locks, appliances, cabinets and countertops, plumbing fixtures, light fixtures, smoke and CO detectors, HVAC filters, bathrooms, trash, abandoned property, yard areas, garage, balcony, or storage areas.
Compare the move-out condition to the move-in condition. This is where a checklist becomes especially useful. A documented move-in baseline helps the landlord separate existing condition, normal wear, and tenant-caused damage.
Step 6: Separate Normal Wear From Damage
Security deposit disputes often arise when landlords and tenants disagree about normal wear versus damage.
Normal wear may include minor scuffs, light carpet wear, or faded paint from ordinary use. Damage may include broken doors, large holes, missing fixtures, pet damage, excessive filth, unauthorized alterations, or destroyed flooring.
The Legal Information Institute’s overview of reasonable wear and tear is a useful reminder that deductions generally become more supportable when the condition exceeds ordinary use.
Best Practice
Do not rely on memory. Use move-in photos, move-out photos, inspection forms, invoices, and lease terms.
If deductions are made from the security deposit, they should be documented and handled according to state law. Deposit deadlines and itemization rules vary by location, so landlords should confirm local requirements.
Step 7: Create a Repair and Turnover Scope
Once the final inspection is complete, create a repair scope. This should separate tenant-caused damage, normal turnover work, safety issues, and owner upgrades.
Prioritize the Work
Start with items that affect habitability, safety, security, and basic function:
- Locks and keys
- Smoke and CO detectors
- Plumbing leaks
- Electrical issues
- HVAC function
- Appliance function
- Trip hazards
- Pest issues
- Water damage
Then move to cleaning, paint touchups, flooring, landscaping, and cosmetic repairs.
Avoid over-improving during turnover unless the upgrade supports higher rent, lower maintenance, or better tenant quality.
Step 8: Reprice the Rental
Turnover is the right time to review rent pricing. Do not automatically relist at the prior rent. Market conditions, property condition, seasonality, and competing listings may have changed.
What to Compare
Review similar rentals by location, bedroom count, bathroom count, square footage, condition, parking, laundry, pet policy, outdoor space, appliances, school zone, commute access, and lease terms.
The right rent is not always the highest rent visible online. If the property is overpriced, vacancy may erase the benefit of a higher asking price. If it is underpriced, the owner may lose income for the entire lease term.
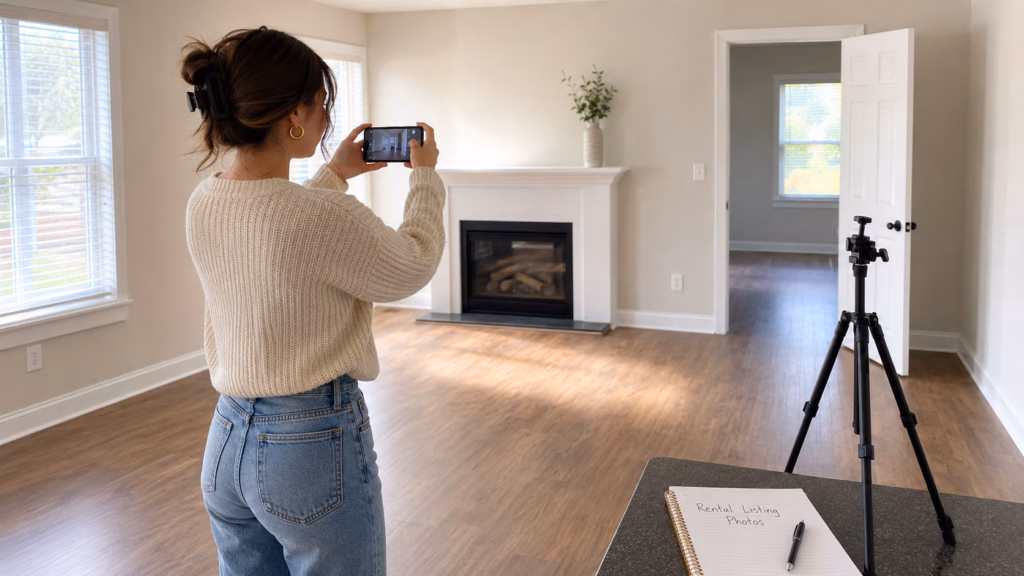
Step 9: Relist With Better Photos and Clear Terms
A good listing can shorten vacancy. A weak listing can cause qualified renters to skip the property.
Listing Essentials
Include clear photos, accurate rent, deposit amount, application process, pet policy, lease term, utilities, parking, laundry, availability date, and basic screening expectations.
Photos should show clean, bright rooms. Do not reuse old photos if the property condition has changed. If repairs are still underway, wait until the property is presentable unless the market supports pre-leasing.
Step 10: Screen Applicants Without Rushing
Vacancy pressure can lead landlords to approve too quickly. That is risky. The tenant turnover checklist should include tenant screening as a required step, not an optional one.
Keep Screening Consistent
Use written criteria. Verify income, rental history, identity, references, and other lawful screening items. Apply the same process to each applicant.
A faster vacancy fill is not helpful if the tenant later stops paying, violates the lease, or damages the property.
Step 11: Execute the Lease and Collect Move-In Funds
Once an applicant is approved, the landlord should complete the lease process before handing over keys.
Before Key Release
Confirm the signed lease, security deposit, first month’s rent, required utilities, renters insurance if required, move-in date, key pickup time, move-in condition checklist, pet documentation if applicable, and HOA or building registration if required.
Do not release keys based only on a promise to pay. Funds should be collected according to the lease and local law.
Step 12: Complete Move-In Documentation
The turnover process is not finished until the new tenancy is properly documented.
Move-In Checklist
Give the new tenant a move-in condition form and require it to be returned within the stated time. Take your own photos before move-in and save them with the lease file.
This protects both sides. The tenant can identify pre-existing issues, and the landlord has a record for future comparison.
Final Tenant Turnover Checklist
A practical tenant turnover process should help landlords control three things: time, condition, and risk.
1. Control the Timeline
Start by confirming the move-out date in writing. Then work backward from that date. Schedule the final inspection, estimate repair time, plan cleaning, and decide when the property can realistically be shown or relisted.
A simple timeline might look like this:
Notice received: confirm move-out date and lease obligations
Two to three weeks before move-out: send move-out instructions
One week before move-out: confirm key return and utility expectations
Move-out day: receive keys and regain possession
Within 24 to 48 hours: complete inspection and repair scope
Within several days: complete cleaning, repairs, photos, and relisting
Before move-in: collect funds, sign lease, and document condition
2. Document the Property Condition
Photos, videos, inspection notes, invoices, and move-in records help prevent disputes. The landlord should compare the property’s move-out condition to the move-in condition before deciding whether any security deposit deductions are appropriate.
Do not rely on memory. A clear record is more useful than a general statement that the property was “dirty” or “damaged.”
3. Protect the Next Tenancy
Turnover is also the start of the next lease cycle. Before approving a new tenant, update the rent price, improve the listing, screen applicants consistently, collect required funds, and complete the lease before releasing keys.
The objective is not simply to fill the vacancy quickly. The objective is to place a qualified tenant in a properly documented rental so the next tenancy starts cleanly.
Download the Free Tenant Turnover Checklist
Get the editable Word and PDF versions of our tenant turnover checklist when you subscribe to our 2X weekly newsletter for landlords, real estate investors, and rental property owners.
Are You Looking To Connect With Property Owners, Landlords, and Real Estate Investors?
Grow your business by connecting with property professionals with our cost-effective advertising options.